
Replacing and Upgrading Macpherson Struts and Shock Absorbers
Macpherson strut suspension is a basic suspension design owned by almost every conventional car maker worldwide, generally for front wheels. Its structure relies upon a fundamental triangular design in two parts: a control arm and a radius rod, which jointly shape a triangle as opposed to the car’s chassis. Typically, this triangle is at the lowest of the suspension, preferably the top.
The control arm finds the wheel afterward, and the radius rod is finished moving front and back in the wheel arch. The control arm was typically powerful and stronger of the two and was identified as that attached straight to the last part of the wheel carrier; it is referred to as the hub. Nowadays, the two have been connected into one. They are much bigger than before. A control arm collaborates with a stabilizer bar associated with the chassis and suspension unit.
Continuing to this, the spring and damper unit is settled vertically or close to it. It is based on an enclosed cylinder that bolts to the hub's top; within it is the shock absorber or damper. At the top, it keeps a baggy collar that cups the coil spring, while the damper shaft runs all the way by the center of the coil to the head of the spring unit, which is bolted speedily to the system of the car.
In this manner, the Macpherson strut generates a three-point fixing structure for the wheel that shows beyond doubt, is very well built and versatile, and can simply be prepared for more required usage like track driving.
The Macpherson strut system title is associated with its inventor Earl S. Macpherson, engaging only a lower suspension arm, which is linked to the lowest of the upright gripping a wheel, known as the ‘’steering knuckle’’.
Macpherson Front Strut Replacement
Macpherson struts are put an end to as an assembly with the spring. The spring is then done away from the strut at the workbench. With haste, when you separate the wheels, inspect the several bolts gripping the strut in place, carry things to the strut, and put in (or undo) penetrating oil to any considered rusty. In the front of a wheel drive car, there will be a rubber boot for the constant velocity joints in the front axle situated directly under the strut. Wrap a shop rag over the assembly to grip any dripping penetrating oil, so that oil does not get on this rubber boot. Take a wire brush to clean rust off any revealed threats. Apart from that, the nut may stall as it is detached due to it not being cut by the accumulated rust.
Penetrating oil may not progress in thirty minutes, an hour, or two hours. It took 6 hours before the penetrating oil freed the stabilizer link bolt on the car. If it is mandatory to replace a nut or bolt used in the suspension, confirm that the new part is at least the same energy grade as the fastener being changed. The standard and metric bolts and nuts both are tagged with energy grades. Standard fasteners use short radical lines on bolt heads and dots on the appearance of nuts to show the grade; the more lines or dots, the higher its strength. Metric fasteners utilize little numerals; again, the bigger the number, the more powerful the fastener. If the latest fastener is required, you may be eligible to buy it as a transformation part through the dealership parts department or a parts’ stock, which should declare assurance that the latest fastener will meet the previous fasteners’ energy standard.

Macpherson Front Strut Replacement Process
Step 1: On the strut towers’ top, there will be two or three small nuts and a changeable plastic cover. The nuts carry the top of the Macpherson strut in place. The struts’ ‘’damper shaft nut’’ is below the plastic cover.
Step 2: The cover of the damper shaft can be conveniently taken out with a screwdriver.
Step 3: Analyze the damper shaft nut before taking action further to acknowledge if you need a specific tool to remove it. If a specific tool is mandatory, obtain it before beginning the job.
Step 4: The strut extends from the head of the steering knuckle to the head of the strut tower. The spring is contained by a bottom spring seat that is part of the strut and an upper spring seat that is joint to the head of the strut. There is a bearing assembly joint to the head of the strut more than the spring seat and directly below the head of the strut tower. This enables the whole spring and struts assembly to rotate as the front wheels are steered.
Step 5: The lower part of the strut joints to the steering knuckle with large bolts. The lower part of the strut is close to the wheel center's level to decrease wheel geometry changes during cornering.
Step 6: Eliminate any wiring or hoses held to the strut by brackets, such as this anti-lock brake wiring, which is routed through a bracket on the strut to the brake caliper.
Step 7: Eliminate the bracket that grasps the brake hose to the strut.
Step 8: In max cars, the brake hose does not require to be detached from the caliper to do away with the strut. Therefore, be conscious of preventing the strut from relying on the hose when the bolts carrying the strut to the strut tower are detached.
Step 9: Disjoin the link to the stabilizer bar. In this car, there is no hexagonal bolt head. To withdraw the bolt, a Torx socket is entered into the finish of the bolt to stop rotation as the nut is withdrawn with a box-end wrench.
Step 10: The nut keeping the stabilizer bar connected to the strut was poorly rusted and would not turn. After continuous applications of penetrating oil over a period of 6 hours, it turned and was withdrawn.
Step 11: Separate the first of the two bolts keeping the bottom of the strut to the steering knuckle, beginning with the highest bolt. Keep the bolt head with a socket wrench and breaker bar while turning the nut with a box-end wrench.
Step 12: Withdraw the second bolt from the lower part of the strut. These are big bolts, so confirm that you have big enough wrenches before beginning this job.
Step 13: When the second bolt is detached, the strut may migrate slightly, adding enough weight to the bolt that can’t be simply pulled out. If so, it can be unscrewed with a socket ratchet from the strut.
Step 14: The lower part of the strut can now be pushed away from the steering knuckle by prying with a big-size screwdriver.
Step 15: Drop out the nuts that carry the head of the strut to the strut tower. Either have someone hold the strut while this is done or brace it with a block of wood so that it doesn’t drop out of these holes when the last/final nut is detached.
Step 16: Drop out the strut from the car is convenient if you begin with the struts’ upper bolts still in their holes in the strut tower. That fosters clearance at the lower part of the strut to move around the brake caliper and rotor as you drop out of the strut.
Step 17: Before introducing disassembling the strut, involve a felt tip pen to mark (on the insulators and upper and lower spring seats) the obvious position of the springs’ ends, both upper and lower. The spring must be settled in the new strut as same as it had been structured in the old one.
Step 18: Connect the spring compressor to the spring. Keep in mind to use the safety pins or clamps supplied with the compressor. Tighten the bolt finger tight and then tighten it with a wrench just enough that it grips itself in place on the spring.
Step 19: Joint the other spring compressor to the other side of the spring.
Step 20: Screw up each of the compressor bolts, substituting them at appropriate intervals so the spring is compressed evenly.
Step 21: Compress the spring until it pulls away from one of the spring seats.
Step 22: The damper shaft nut can be dropped out with the spring compressed. This requires two wrenches, one to prevent the shaft from rotating and the other to loosen the nut. In many cars, the nut is detached with a box-end wrench, but this car demanded the dreaded specific tool. The special tool was improvised by consulting a Vice-Grip to grasp a socket of the proper size and tracking a Torx bit through the hole in the socket to the shaft.
Step 23: Drop out the bearing assembly, upper spring seat, insulators, dust cover, and spring from the old strut.
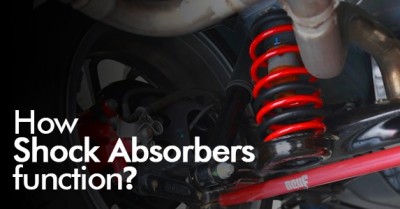
Shock Absorber Replacement
Shock absorber replacement is simple: drop out the bolt or bolts carrying the bottom of the shock to the suspension arm, eliminate the nut or nuts carrying the upper part in place, and then detach the shock absorber. It’s the completion that can be an issue. Shock absorber mounting bolts live in a hostile environment, uncovering dirt and water, so they rust.
.png)
Shock Absorber Replacement Process
Step 1: The shock absorber in this rear suspension is noticeable behind the brake rotor.
Step 2: Shock absorbers, unlike struts, are separate from the spring. Shock absorbers do not encourage the cars’ springs to do that. Rather, they dampen the springs’ oscillations by forcing fluid in one chamber of the shock absorber by a valve into another chamber.
Step 3: Drop out any hoses or wiring linked to the shock absorber, such as this air hose. Eliminating the clip releases the hose.
Step 4: With the clip removed, the horse pulls off. Air hose connections are found on cars with automatic leveling. Several luxury cars have shock absorbers with electronically adjusted valves between the fluid chambers.
Step 5: Separate the lower shock absorber mounting bolt.
Step 6: Because shock absorbers don’t support the weight of the car, there is no need to jack the suspension when removing them. But using a jack to lift the suspension slightly can make it super easy to pull the mounting bolt out of the shock absorber and suspension arm.
Step 7: We can also use a socket extension as a drift to tap the bolt out with a hammer. But be alert not to damage the threads if the bolts are to be reinstalled.
Step 8: A nut splitter cuts through the side of a frozen nut. Look forward to replacing the bolt also. Even if it isn’t rusted, the splitter will probably damage the bolt threads as it cuts through the nut.
Suspension upgrading
Restoring genuine equipment shocks, struts, and springs is one of the most famous and proper ways to improve car handling. By the obvious resulting lowering of the car, it is also one of the most favored appearance boosting. Gas-charged shock absorbers and struts are one of the most fundamental suspension upgrades, although they are genuine equipment on a few vehicles. These use pressurized nitrogen gas instead of air inside the shock absorber. This deducts the aeration and foaming of the shock absorber’s hydraulic fluid, which quickens the response to cornering and road conditions. Gas shocks and struts tend to be stiffer than real equipment shocks and minimize body lean during cornering.
Replacing springs, however, is the most fundamental suspension modification. By replacing springs, the car can be lowered, the ride and cornering characteristics changed, and the handling tailored to the driver’s specifications. But these modifications, if not properly done, can make a car virtually undrivable. For example, if a car is lowered too much, the available suspension travel can be down to the point that handling is seriously discouraged.
Several aftermarket suppliers are experts in performance suspension components and offer overall packages, at various stages of performance, that are tailored to a specific make and model of car. These packages include all the parts essential to the modifications and have been engineered and tested by people who know what kind of performance they are giving.


Comments (0)